Work sections
Click a section for details
Context and Background
Idea, inspiration, and "why?"
Context and Background
Idea, inspiration, and "why?"
Project Context
In February of 2026, I assistant directed Diary of a Wimpy Kid: The Musical with The Children's Theatre of Cincinnati (TCT), the oldest theatre for young audiences in the United States.
During a creative team meeting during the second week of the project, the director Maddie Jones and I came across a scene that called for the main character Greg to be playing a videogame which he then loses. She pitched that I could create something for the game since she knew I was studying Game Development, and after a bit of back and forth we had a rough outline of the plan on how to physically execute the effect on stage - but the creative reigns for everything else on the project were handed over to me. The 25 - 26 season marked TCT's first season in The Emery, their newly rennovated high-tech home, and I wanted to make sure the deliverable matched the upped ante of the effects the new theater supported.
Existing IP Inspiration
Because I was working with an established IP, I did a bit of research into how Twisted Wizard has been represented in other versions of Diary of a Wimpy Kid. The one that stuck out most to me was the version from the live action version of Diary of a Wimpy Kid: Dog Days.
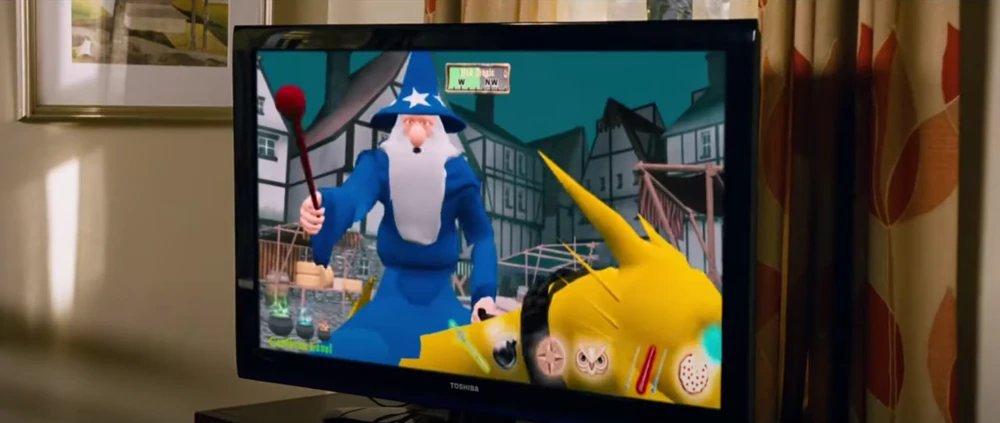
While we don't get to see much of it, what we do see invokes the vibe of a late 00s early 10s Xbox 360 game. I decided to use this idea to guide some visual choices, including reduced visual fidelity, less saturated colors, and a little too much bloom - all hallmarks of many games from that time period. The reduced visual fidelity would help me by making assets easier to create and acquire, while the reduced saturation also made sure the game stayed in the background, and the action remained focused on the actors.
I made sure to sneak in lots of references to other games in the project. I'll dive deeper into them in the next section!
Design
Level design, character modeling, and UI design
Design
Level design, character modeling, and UI design
Level Design
Timing the show, I knew the whole sequence needed to be about 100 seconds long. With menu timing, this meant the level itself only needed to be played for about 80-90 seconds, which let the design stay pretty basic.
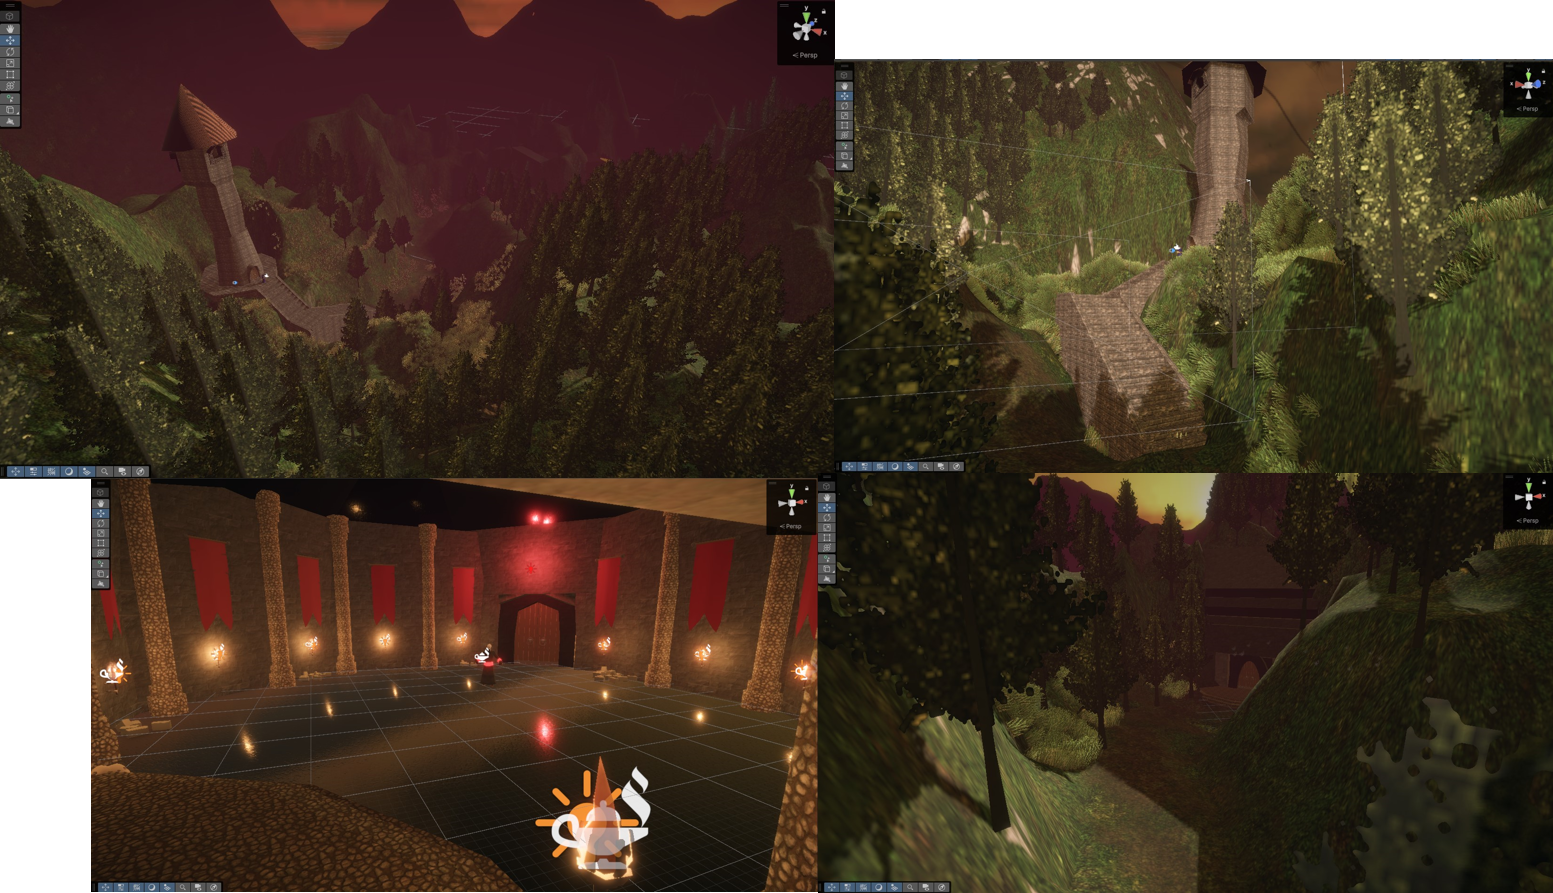
While in a real game, it might not make much sense for the player's home to lead directly to a boss encounter, I felt it was important to use the tower a landmark to reinforce the "wizard" themeing. The area name "Moonwell Pass" comes from the 2000s web cartoon Unforgotten Realms by Robert Moran, which has no significance to the area, but felt appropriate due to the area appearing as a break in a mountain ridge.
The level was also designed to have a final room with dialogue that could be stalled for a bit, that way small variations in performance timing wouldn't cause the sequence to fall apart.
Modeling the Wizard
While this might not have been necessary (and certainly something I would hesitate to do again), I decided to try and model the player character myself. I felt it was a good opportunity to better educate myself on what a modeler's work flow might look like, and to pick up some vocabulary that may be helpful when speaking to a 3D artist.
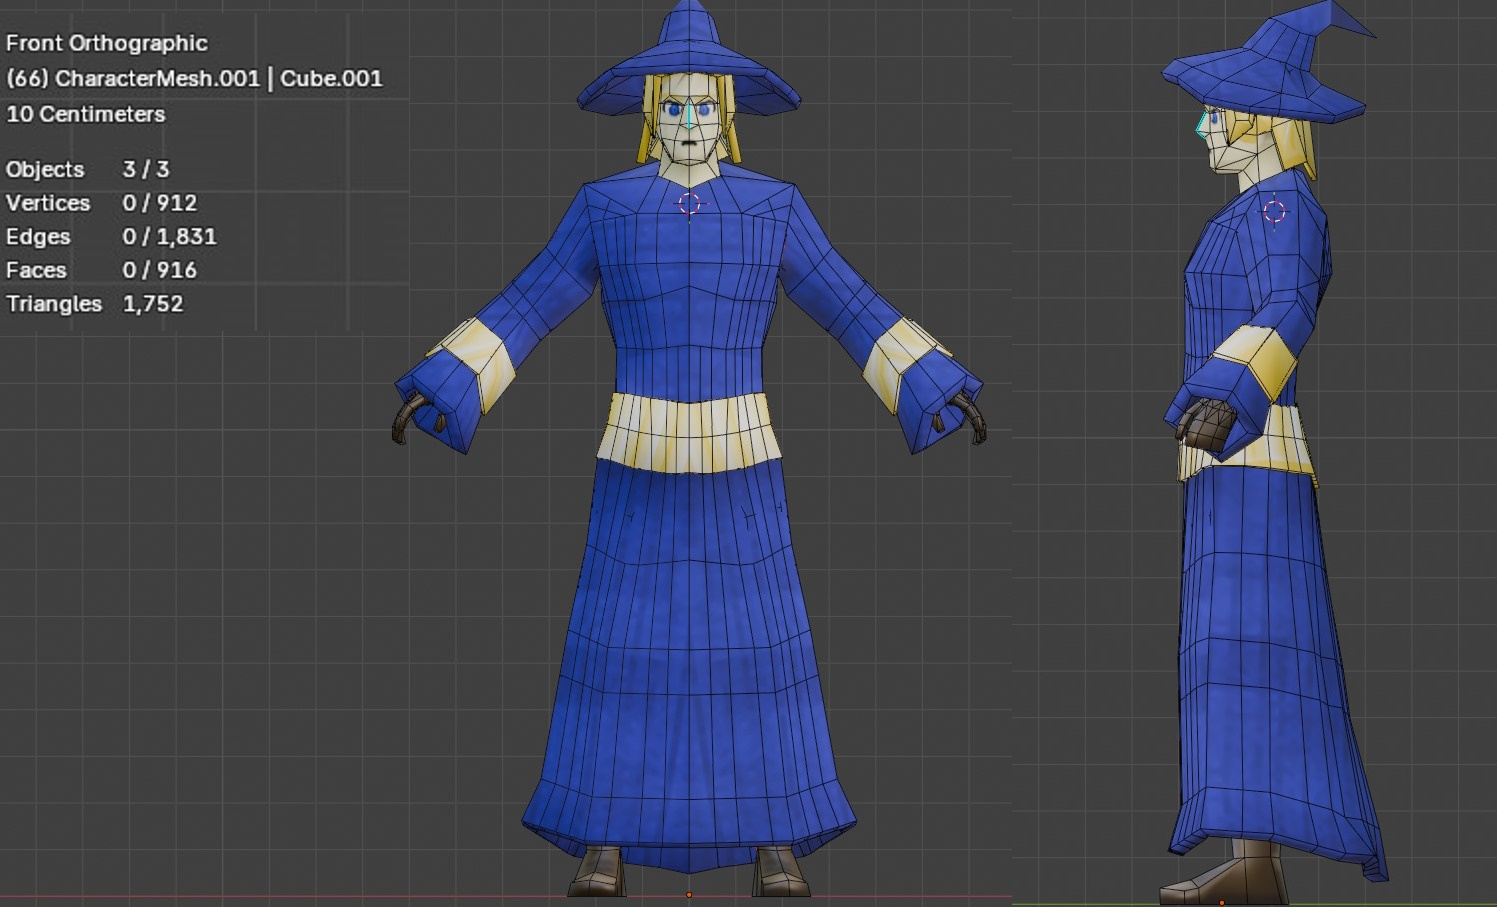
...he's a little ugly, BUT building the model myself let me really reinforce the wizard theme further - the typical "blue and gold" robes, evocative of Merlin in Sword in the Stone or Merle Ambrose from Wizard 101. I was also able to model the character off of how I thought Greg would choose to create a character in this game, a self-insert with a more masculine, grown up appearance.
Another bonus of creating the model myself was that I didn't need to worry about getting attribution for assets in the program. Everything else used that I didn't make myself was CC0, meaning that attribution became a non-issue. While I absolutely believe in crediting artists, finding space in the program three weeks before opening the show would've been quite a feat!
UI Design
Since the stage business picked up with Greg "starting the game" and turning on the TV, I wanted to make sure the UI was readable from the house (audience), without taking up too much time (since we did need to get from game start to player character death in about 90 seconds).
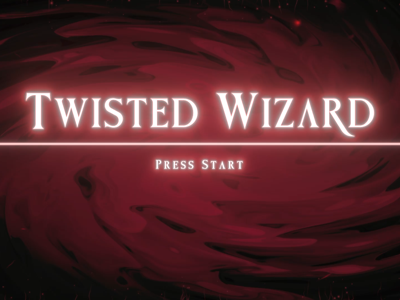
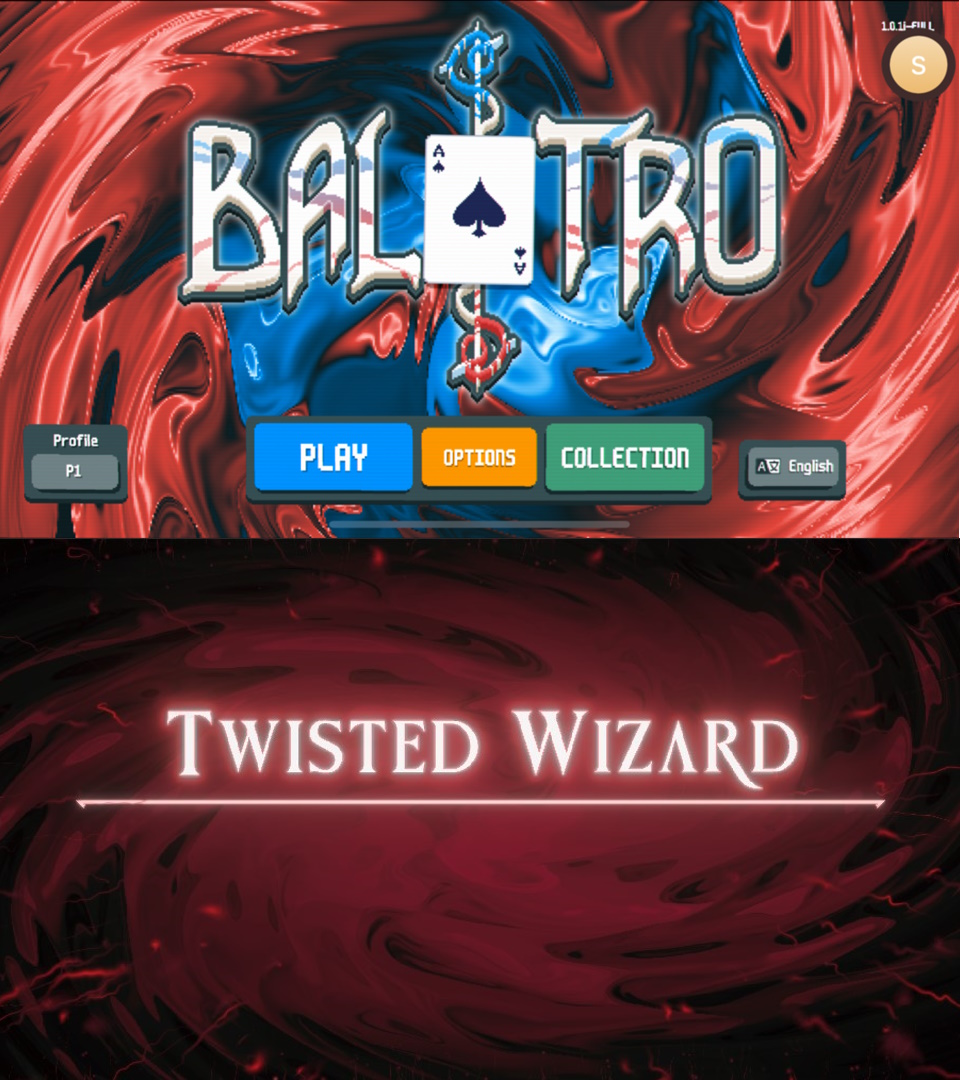
I'll talk more about the actual way the effects were created in the VFX section, but the background of the title screen is very obviously inspired by Balatro's title screen background. I felt that for a game called "Twisted Wizard" a swirling vortex was more than appropriate and this would hopefully be a reference some in the audience would pick up on.
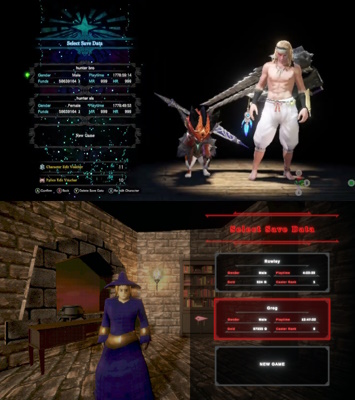
The character select screen is inspired by the Monster Hunter World character select screen in terms of layout. I even added a "Caster Rank" to mimic where "Hunter Rank" is on the character select of MH:W.
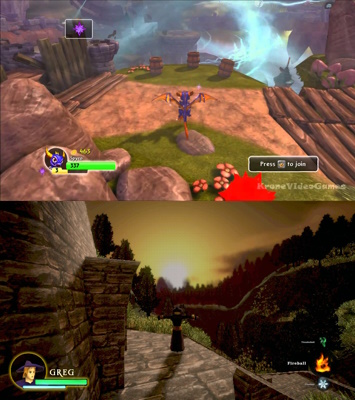
The in game HUD draws it's primary inspiration from the HUD for Skylanders: Spyro's Adventure, where the character portrait appears in the bottom left with their name and health, but I decided to swap the XP bar for a mana bar.
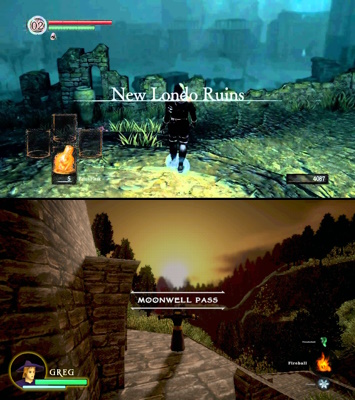
The pop-up of the area name, "Moonwell Pass", is inspired by Dark Souls' area name pop-ups upon entering an area.
Visual Effects and Shader Graph Work
Shader and VFX breakdowns
Visual Effects and Shader Graph Work
Shader and VFX breakdowns
Title Screen Shader
The shader for the title screen is based off of this shader by xxidbr9 on Shadertoy - though with some modifications and optimizations made. I decided to build the shader using Shader Graph, as while it would've likely been easier to directly translate the code to a normal HLSL shader, I was looking to gain more experience with Shader Graph.
The first big chunk of the shader deals with creating the initial swirl on the UVs, remapping from [0,1] to [-0.5,0.5].
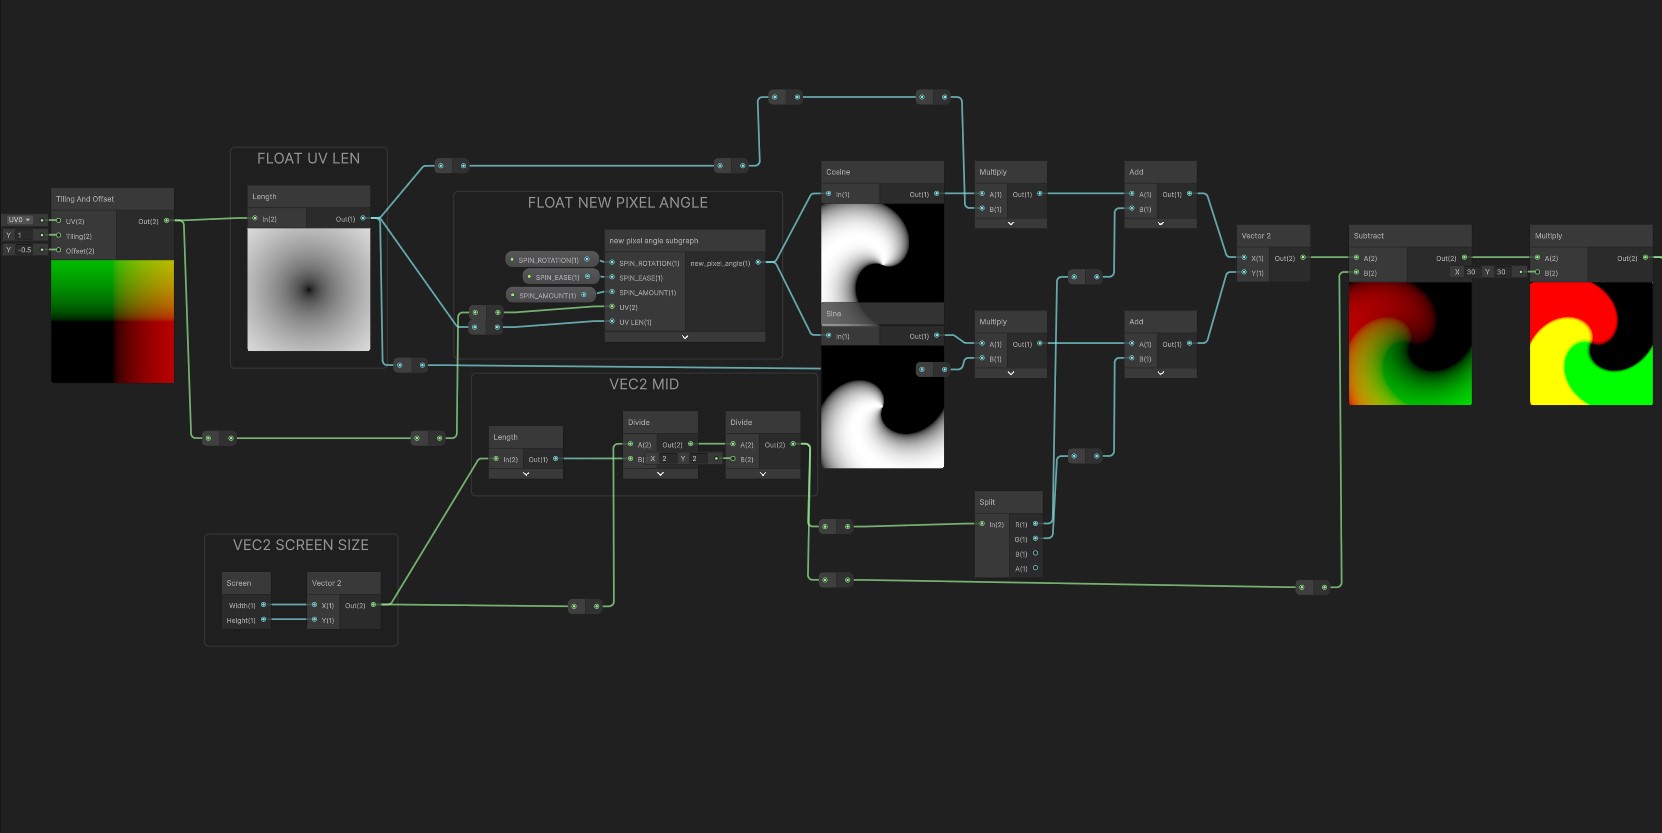
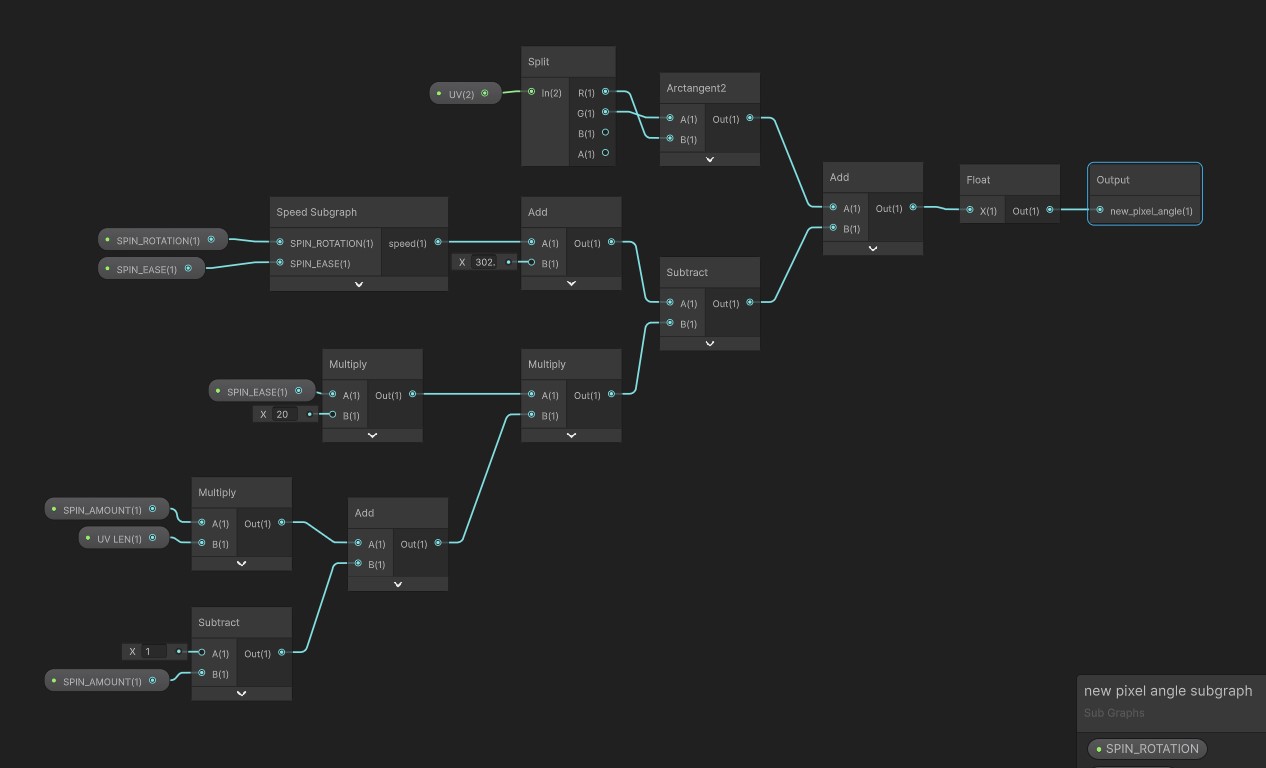
This also includes calculating the swirl angle using the arctangent with the offset UVs with a subgraph that factors in spin speed, rotation, and amount.
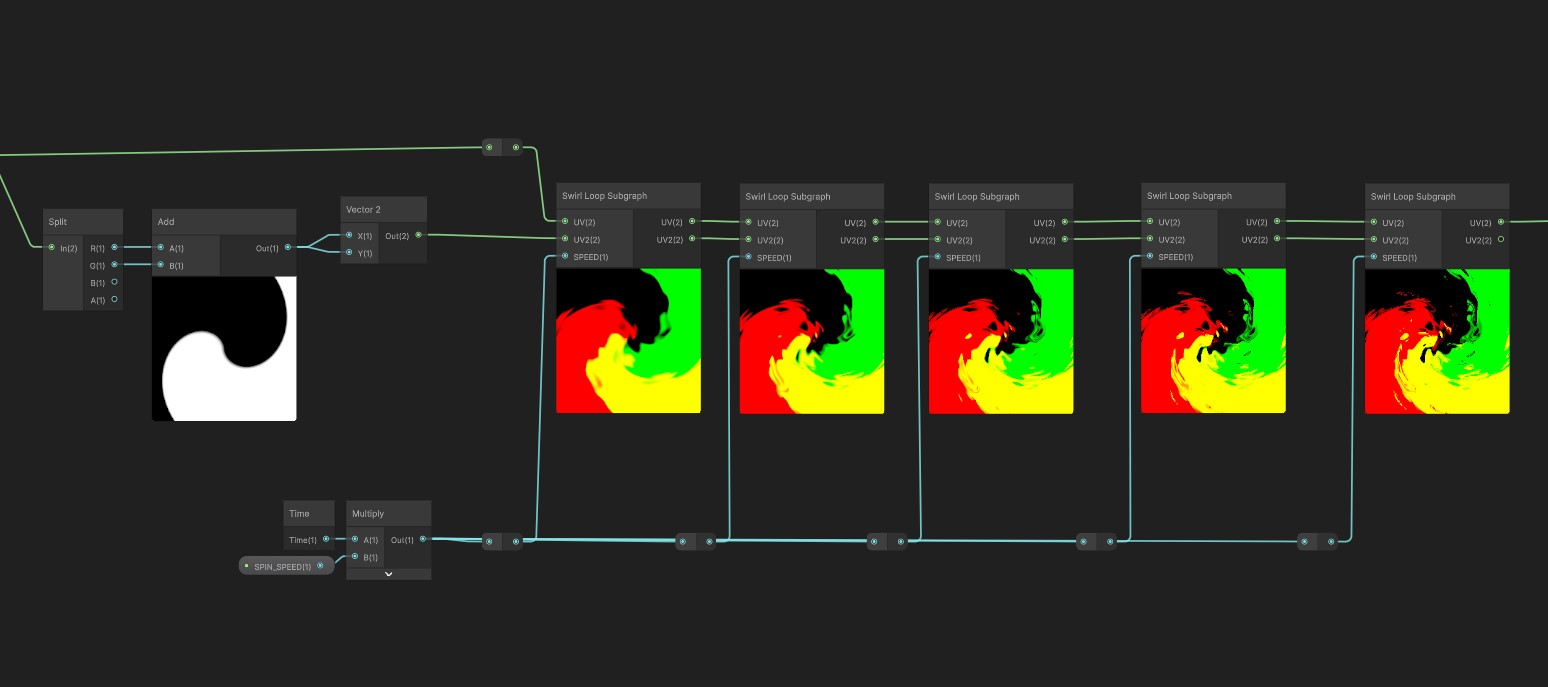
Following this, the swirled UVs are run through the "Swirl Loop Subgraph" 5 times, which gives the swirl the iconic mixed paint effect. This is also responsible for the effect's rotation.
Next, the contrast modifier is calculated and the swirled UVs have their length used to calculate a grayscale value, ranging [0,2]. The brightest sections appear on the outside of the swirl - this is because of the earlier [-0.5,0.5] UV remap, making sure the UVs on the edges have the highest length.
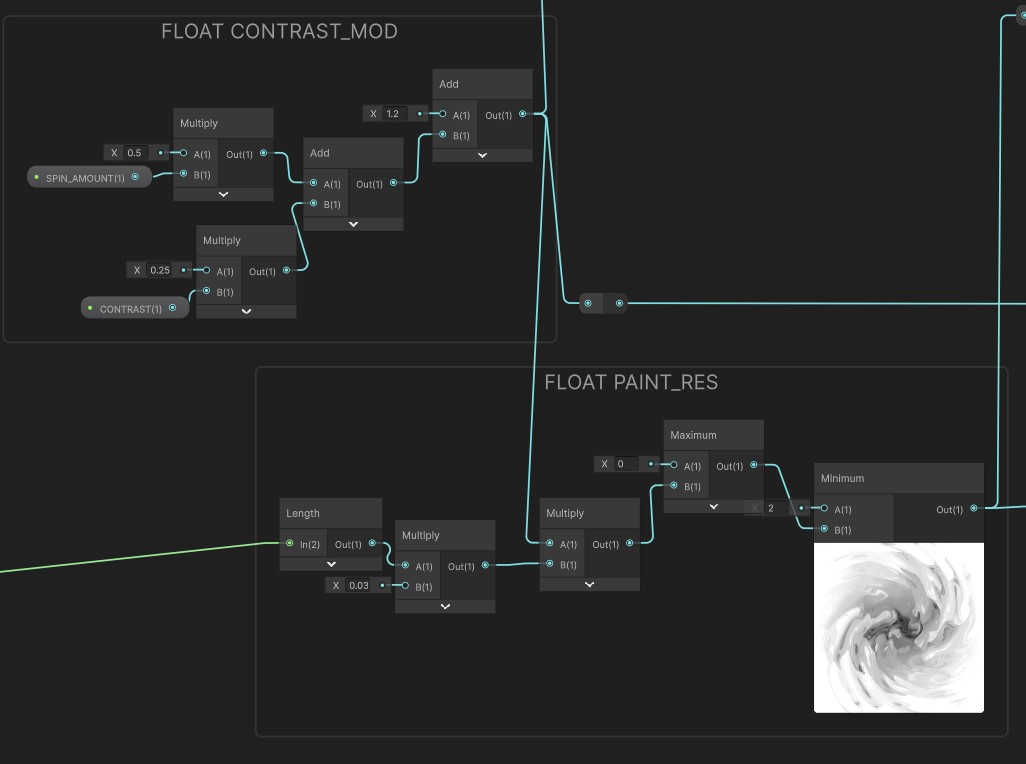
The bright values (those above 1) then become the "outer" part of the vortex. This is done by taking one minus the grayscale value, ensuring that the brightest sections that are > 1 (those appearing on the outside) become negative. Taking the absolute value, adding the contrast modifier, and taking one minus this new value again separates the outer swirl. A similar inverted process is performed for isolating the innter portion of the swirl.
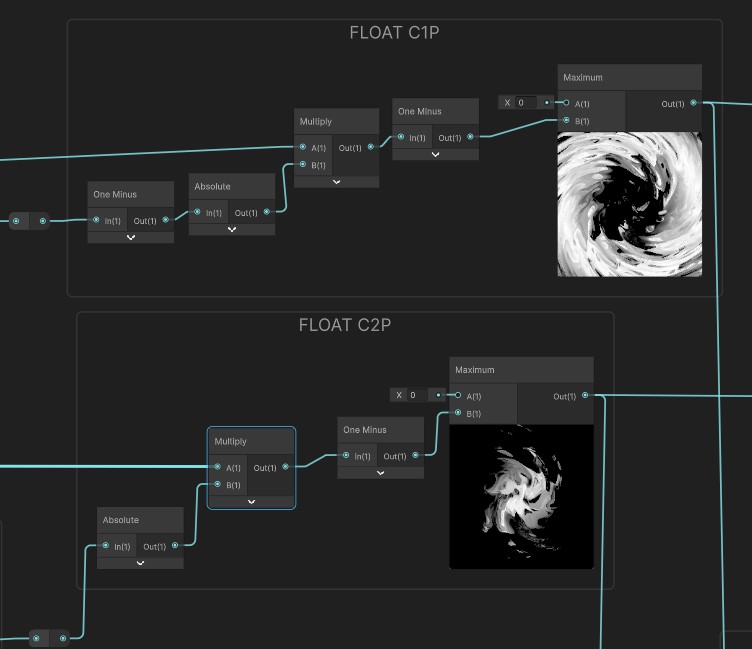
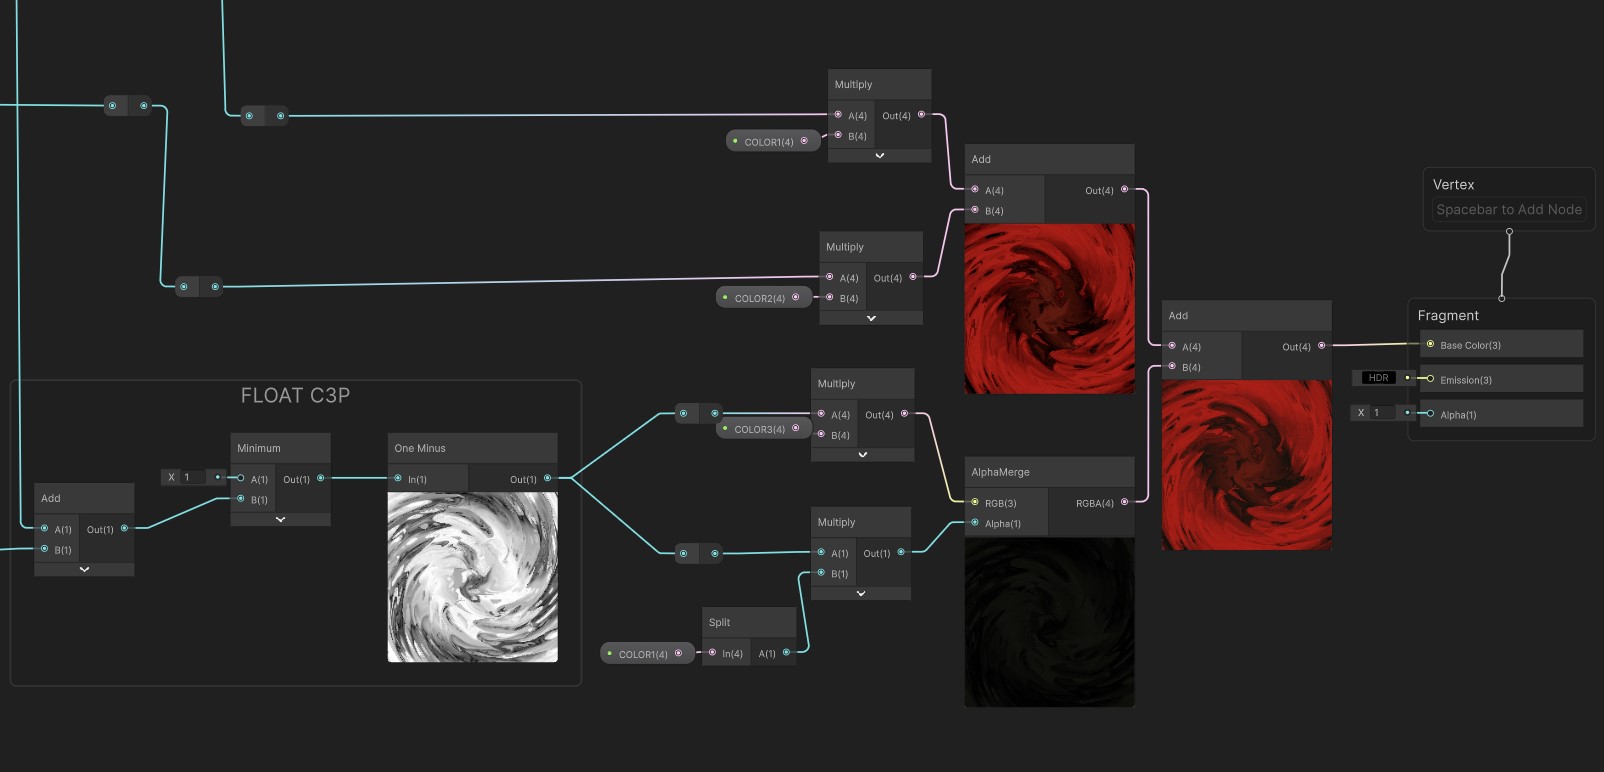
After the separation and constrast mod application, each of the isolated sections get a color applied. The isolated sections are also combined, remapped to a [0,1] range and inverted, then multiplied with a shadow color. The shadows are then added to the two isolated vortex parts to create the final effect.
Energy Beam
The beam that Maloc uses is pretty simple, just using a muzzle flash, energy particles, and a beam quad that uses a custom shader. The beam quad particle has three instances, with the main color, secondary, and shadow colors.
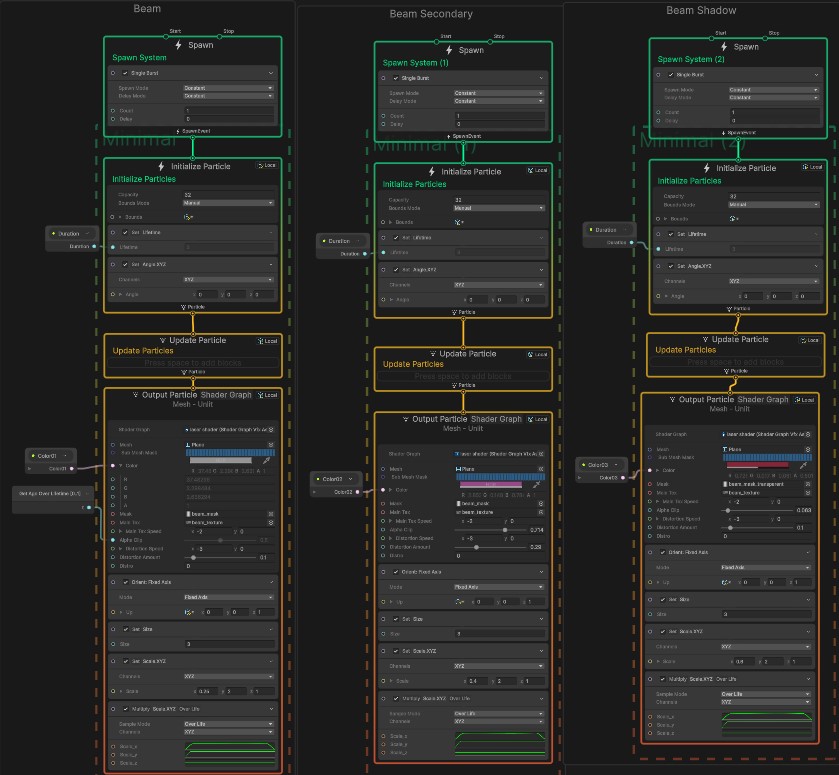
The shader for the beam creates a scrolling texture, adding noise and fading on the edges from a mask texture.
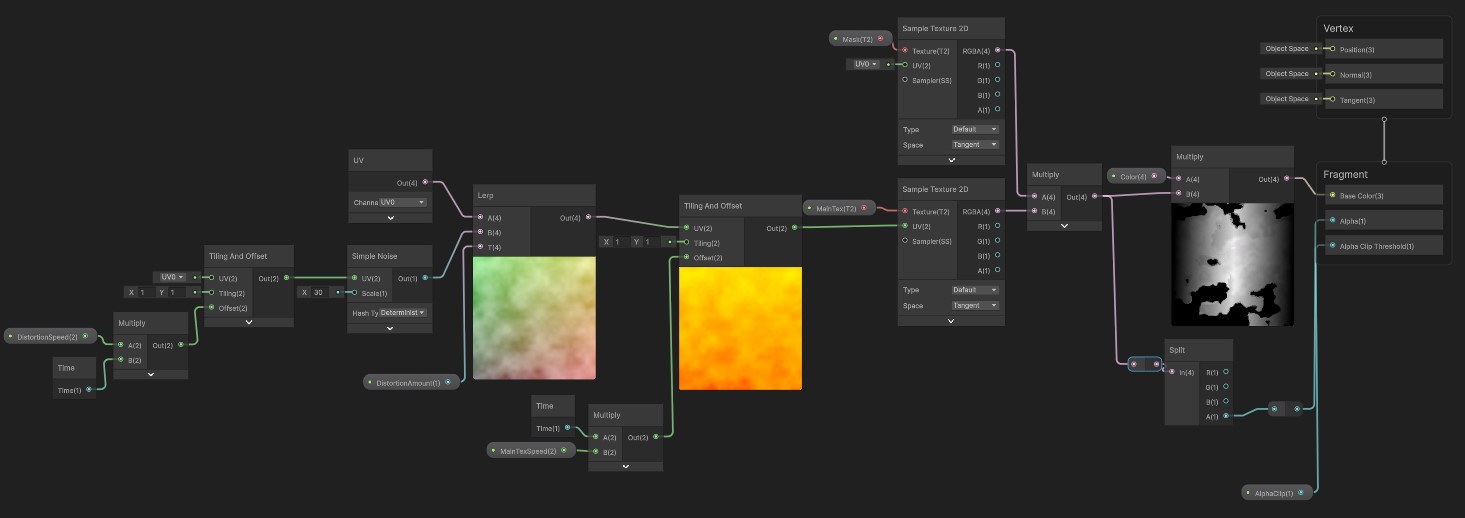
Grass Shader
The grass is made up of four planes, each using a shader that offsets the top vertices to mimic wind, with parameters for wind movement, density, and strength.
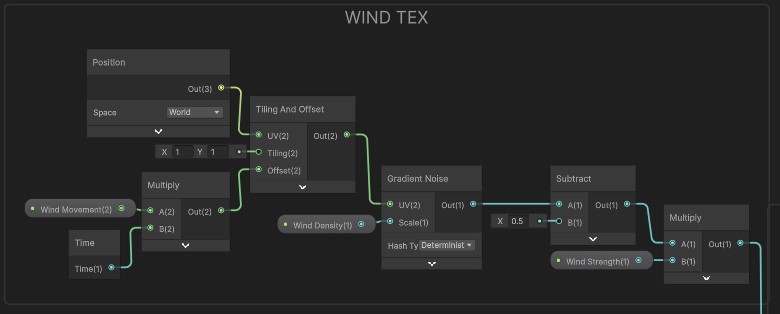
Physical Setup
QLab wiring, controller setup, and demo
Physical Setup
QLab wiring, controller setup, and demo
Laptop Rigging
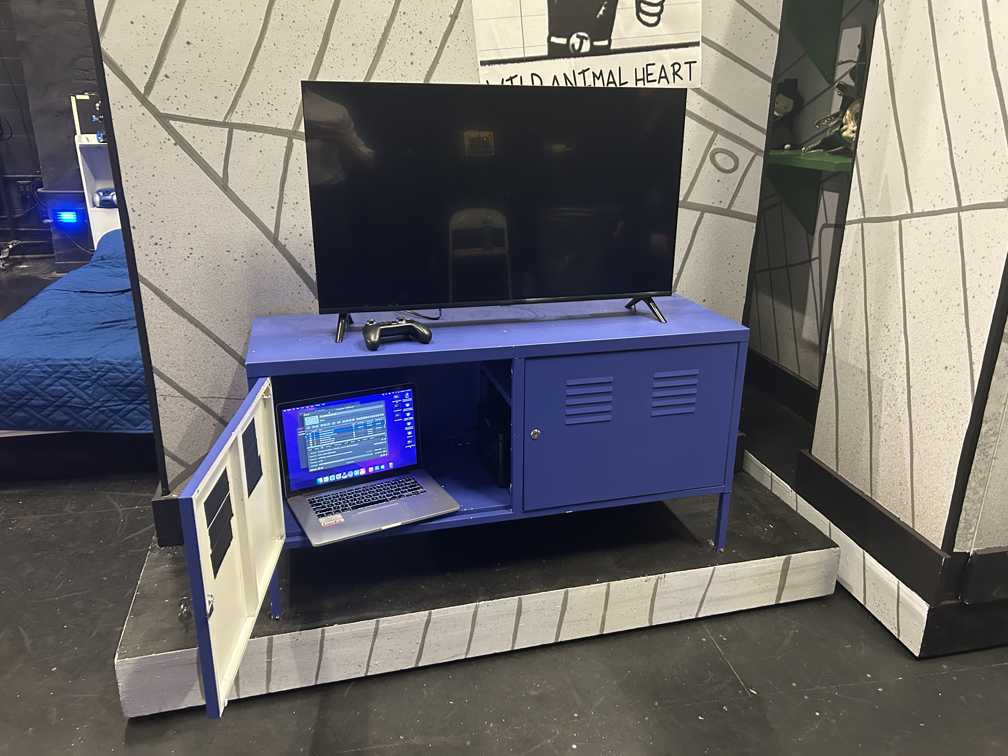
To run the game in the show, the stage manager and I decided to rig a laptop with a popular program used in live theatre, QLab. QLab is a simple program that can be used to run different audio and visual cues in a show, but the biggest restriction with this was that the gameplay would need to be pre-recorded. Because of this, I decided to partially sequence the gameplay using Unity's Timeline feature, and live record some of the gameplay, all in one take to keep consistency. This means that menus and UI pop-ups are primarily executed through Timeline, while character movements and triggers for moving forward are triggered by my input.
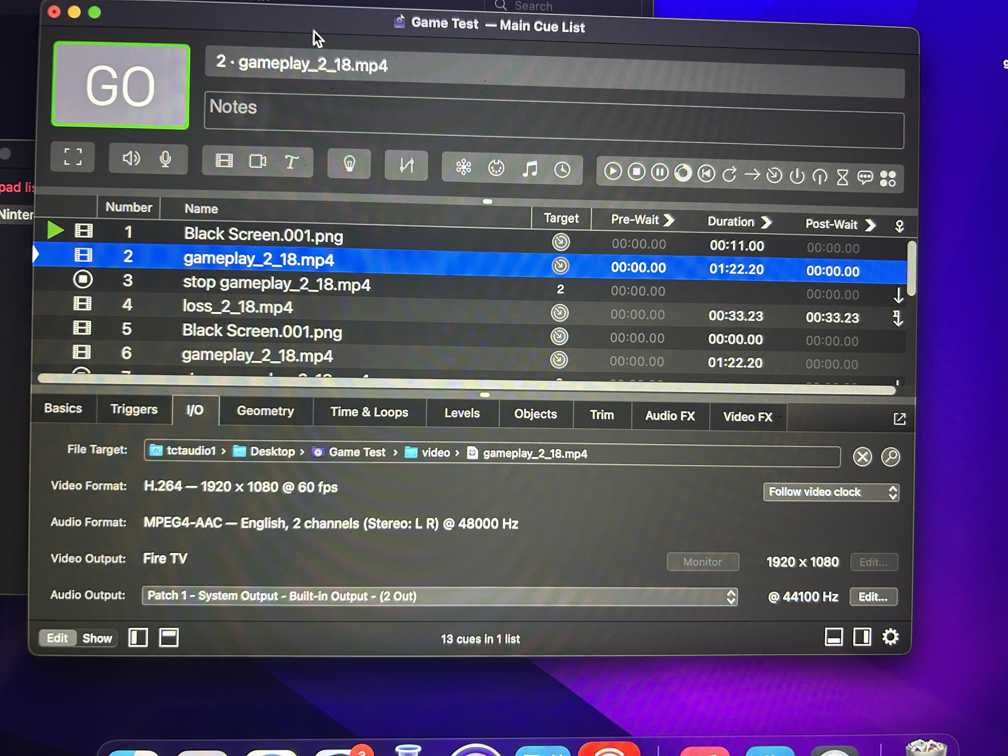
The video for gameplay was split into two main sections: the bulk of the gameplay, which ends with a dialogue box that can be stalled, and the player character dying. This made sure the gameplay could always match the timing of the show and be in sync with relevant dialogue.
Controller Setup
We then paired a controller to the laptop running QLab, and configured it so that the south face button progressed to the next cue, the north face button rewinded a cue, and then left analog stick can be used to quickly flip between cues. The laptop was then stashed underneath a TV console on stage and connected to the TV.
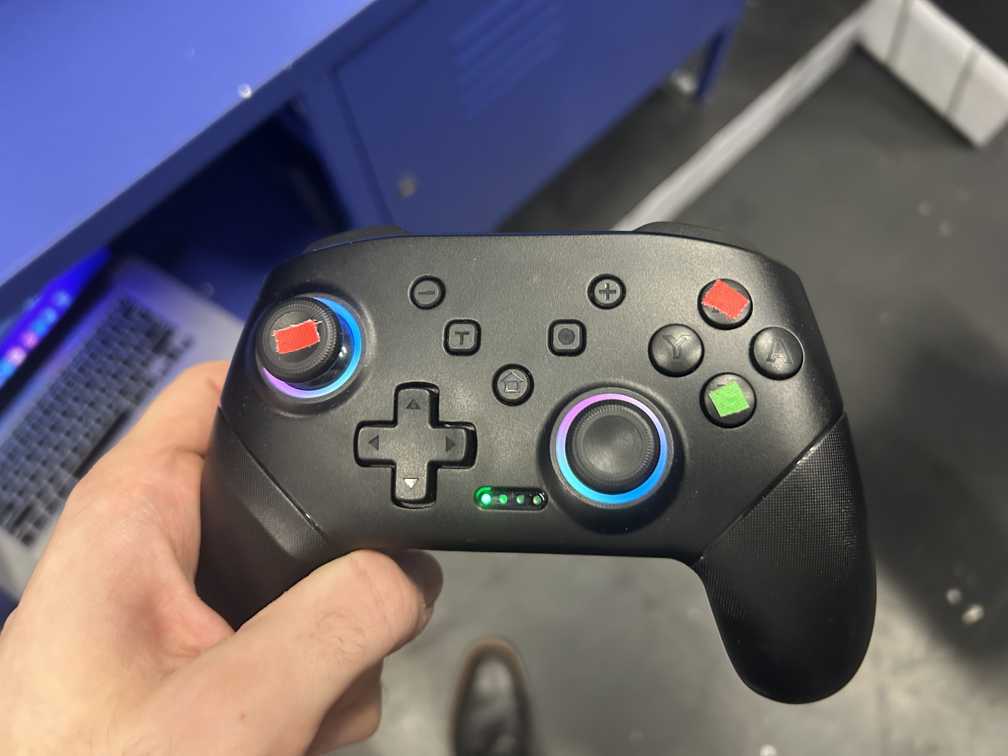
Demo
Here's a video of me backstage using the controller to quickly skip through the full game sequence:
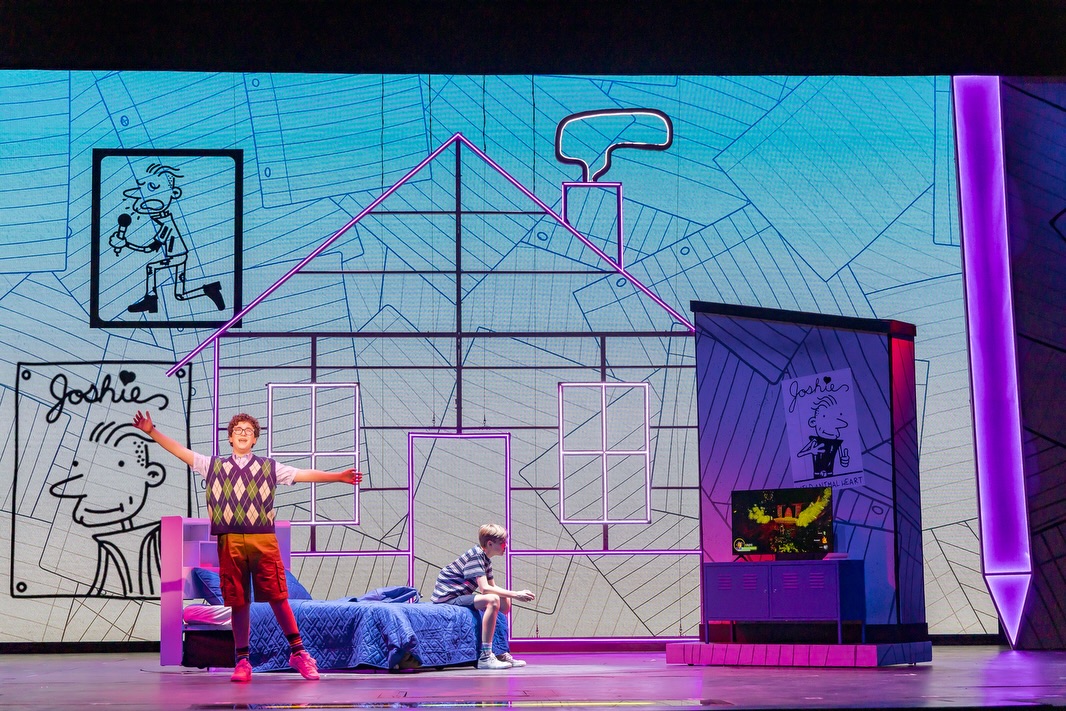
And one of our production photos, where you can spot the game playing on the TV: